 Whether you’re moving into a new place, or are frustrated with the current chaos of your kitchen shelves, we’re here to help! Follow our handy tips and tricks to have a functional, organized and livable kitchen.
Let’s dive right in.
STAGE YOUR STUFF
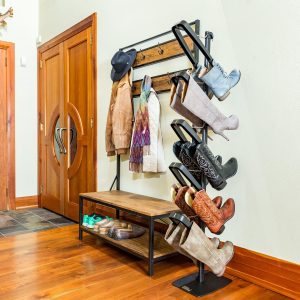
To begin, what we’re going to do is take an inventory of all the things you store on your shelves. Open up all your shelves, open up all your drawers, and take a look. For a complete kitchen shelf overhaul, you’re going to start by taking everything out of where it’s currently stored and putting it into a staging area. (We’re very fond of those, whether you’re re-organizing a closet full of boots or today’s kitchen shelves.) If possible, don’t use your kitchen counters as a staging area, as we’ll need that space very soon, and need it to be free and uncluttered. Use your kitchen table, use chairs, even — in a pinch — the floor. The important thing is to have an empty set of shelves and drawers, aka a nice clean slate.
CLEAN THOSE SHELVES
Clean those shelves and drawers first, so that they’ll be nice and dry by the time you’re ready to put stuff back in. Use a hand vac in kitchen drawers to get rid of all those tiny little crumbs that tend to accumulate there. You can also use that hand vac to get into the corners of your shelves. Then, mix up a concoction of warm water and your favorite cleaning solution. It can be as simple as a few drops of liquid dishwashing soap; you can also squeeze a few drops of lemon juice in there for extra freshness. Wipe all surfaces with a cotton rag, then wipe again to make sure all the soap is gone. Make sure you get the inside and outside of any drawer doors; for extra stubborn stains, grab a magic eraser. If you’re using shelf liners, this is a good time to replace them with fresh ones.
Once your cleaning task is done, let it dry, and let’s turn our attention to your Kitchen Stuff.
DOWNSIZE
Take a look. Do you have enough? Is there one thing that you’re constantly missing and wish you had? Put it on your grocery list. Do you have too many things? If so, this is the perfect time to downsize. Coffee mugs tend to accumulate and grow in number almost mysteriously; if there are mugs that are always shoved into the back of a shelf that no one ever wants to use, this is a great time to say goodbye to them.
Have a section in your staging area for these types of items. Think about when the last time you used each item was. If it’s been longer than a year, chances are it’s outlived its welcome in your kitchen. Leave that area be for now; you can (and should!) add to it throughout this entire process. And once you’re done, you can either sell the items at a garage/yard / stoop sale, donate them to your local charity in need of such items, or — if they’re broken, either recycle them or throw them out.
FIND NEW SPACE
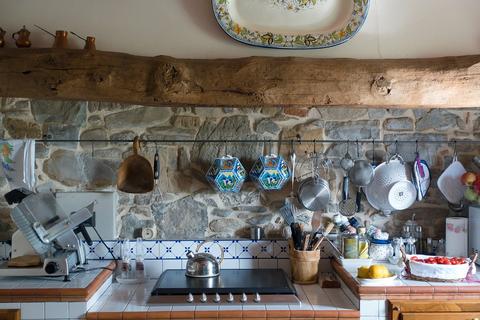
Your very first task is to find previously unused space. Think of it as solving a mystery: Where can I put things besides on my shelves and drawers? Here are some of our ideas:
- Hang It Up. Many kitchen utensils, including pots and pans, have holes in their handles. Ever noticed that? These are helpful because they mean that you can hang these up! Your kitchen might already have a spot under the kitchen cabinets (i.e. the space between the upper cabinets and the base cabinets) or on the back of the doors on some of your base cabinets where you can drill some holes and install some hooks or even long screws. If not, you can install molding yourself: Pick some up at your local hardware store. Measure the space where you want it installed, and either buy pre-cut molding or ask that the store cut it for you. If your kitchen walls aren’t drillable, you can buy products that attach to your kitchen tiles without any drilling involved. Once this project is done, organize your utensils so that they’re within arm’s reach when you’re cooking and baking.
- Hook It Up. If you’re a big coffee or tea drinker and use lots of mugs, you can install individual hooks underneath your kitchen cabinets for each mug. Make sure that the hooks are deep enough so that the mug doesn’t slide off easily and fall. Since mugs take up lots of space when stacked on shelves, you’ll save lots of space!
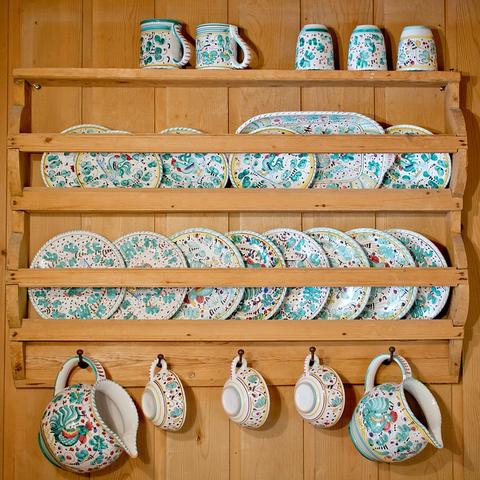
- Wall Space. If you have bare walls in your kitchen, see how creative you can get with hanging storage solutions on them. If you have a colorful collection of plates, for example, install a dish shelf: These have a nice vertical footprint, meaning that they won’t get in the way of anyone walking by. Or, you can use your wall space to install heavier duty hooks for pots and pans, and smaller hooks for items like a kitchen apron and dish towels.
TOP OF THE CABINET
For those of you who have kitchen cabinet doors that don’t extend all the way to the ceiling, that space between the top of the doors and the ceiling is a good storage spot. What you’re going to place here can be a combination of seasonal items and decorations: Those cookie tins you only use during the holidays, for example, stored inside beautiful wicker baskets. The top of cabinets is also a good location for large items such as a wooden board you use to roll out the baking dough, for example. You can also place plants up there for a lovely pop of green and color.
DRAWERS + SHELVES
And now, finally, we’re going to tackle the stuff that goes into your drawers and shelves. If you’ve followed our tips — including finding new space AND downsizing — you’re going to be dealing with much less than what you began with. And that’s the point! Because now you have fewer things to arrange inside those drawers and shelves.
But we’re not just going to place things back in willy-nilly. First, see if there are spots where you can put wire baskets that slide underneath shelves (see photo). These are handy so that you can vertically store multiple different sizes of plates, for example. 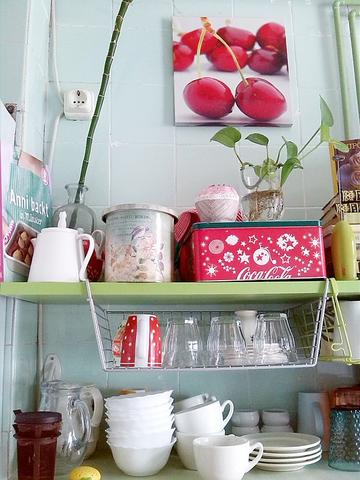
Install a rack for wine glasses so that you can hang these upside down on the inside of one of your drawers; you’ll gain lots of valuable space.
Drawers will also benefit from partitions (dividers): Have a dedicated holder for your all your forks and knives and spoons. Put smaller holders into empty spaces in your drawers and dedicate each one to a particular group of items: Rubber bands, for example (won’t it be nice to never hunt around for those again?)
FOOD ITEMS
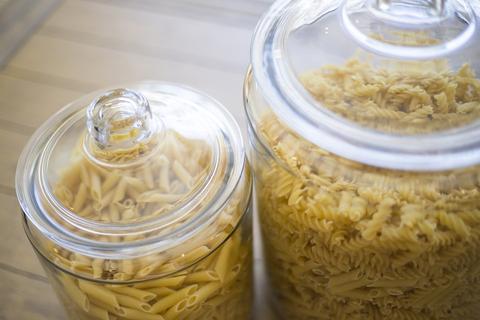
Jars are also great for storing food items such as raisins, nuts, flour, sugar, pasta.
See how organized you can get with your food items; instead of placing bags that can be bulky inside kitchen shelves, transfer those items to jars once you bring them home from the grocery store. You’ll not only save space, but your shelves will look much neater!
