 Spring is here!
Buds are blooming, the sun is high in the sky, and we’re all thrilled to be tossing off our bulky winter gear. Time for a season clothing switch! Which doesn’t have to be a dreary experience?
We’ll take you through it, step-by-step.
Let’s go! Out With The Old; In With The New
What an excellent time to go through your wardrobe, so that’s where we’ll begin. (We’ve got some great articles to help you along with this process. Check out our Declutter, Unclutter and Clutter No More, as well as Purge, Purge, Purge.)
Set a goal for yourself with this one. It can be super specific, such as I’ll get rid of 5 t-shirts, 4 dresses, 3 pairs of pants, 2 pairs of shoes, and 1 workout clothing item. Or, more general: 20 items. Having a marker — however arbitrary, however made-up — will be a good guidepost.
Things to think about:
- Did I go through this exact same process the last time I did my clothing switch, aka did I look at this particular sweater and think, well, I haven’t worn it for the past 3 winters but maybe, maybe, maybe next winter? Because if that’s the case, that sweater is probably never going to make it into an outfit and will be doomed to live a sad little life being shuffled from closet shelf to storage box and back again.
- Let’s sidetrack a bit and talk exceptions to the last paragraph because of course, they exist.


- If that particular sweater is one your grandma made you, and you can’t bear to part with it: Don’t. If it has strong sentimental and emotional value for you, then it’s a keeper. And maybe it’s a keeper in a different way. You may never wear it. But someone else in your family might. Or, you can find a fun DIY project where that sweater is transformed into a beautiful slip cushion. If you’re a knitter, maybe it becomes a cozy winter hat and a pair of loves.
All right. Back on track. Let’s keep talking purging. More things to think about:
Unflattering and uncomfortable items must go. And that is that. If you look at yourself while you’re wearing something and it doesn’t look or feel right to you — even if you hear, Oh, but it looks so great! — listen to yourself. You’re the one who has to live your day wearing that item. If it doesn’t feel good, it’s out, period.
Once you’ve got a nice purge pile going, time to figure out what to do with it. Clean clothing that you no longer need may come in handy to someone else. Find a local shelter or church, or organize a clothing drive of your own.
Or, host a garage/ yard/stoop sale!
Clean It Up
 Next: Don’t even think about packing away clothing that hasn’t been thoroughly cleaned. Why? Because you don’t want to be unpacking it in half a year to find that some tiny little insects have made holes in your clothes, attracted to food bits (shudder!). We know that’s a pretty horrifying thought, so wash those clothes. Take care of spills and stains. Note that when prepping clothes for storage, it’s a good idea to avoid fabric softener, because the scent can attract moths and other insects.
Also: Fix anything that needs fixing. You don’t want to be stuck with a batch of clothes that need mending when that cold weather comes around and you need to wear those sweaters and boots right then and there.
Fold It Up; Pack It Up
Let’s talk containers. If you have extra suitcases that you won’t be using over the next half year or so, that’s a good option. Plastic containers are also good and come in a great variety of shapes and sizes. Make sure that they have good seals.
Cardboard boxes are not optimal if you live in a damp climate or will be storing them in a place where insects might be able to get inside. For delicate items such as cashmere sweater, hats, and scarves, line whatever container you’re using with acid-free tissue paper. Place a block of cedar or lavender into each container. They’re great at repelling bugs and smell lovely too.
 If you have minimal space, consider vacuum seal bags. You can stack a number of them inside a larger plastic bin for extra protection. Store like with like. This’ll make it easier when you unpack and organize your seasonal wardrobe the next time around. Pack the heaviest items on the bottom, lightest on top — this will help with wrinkling and creasing. As far as storing heavy coats and jackets, there are two schools of thought:
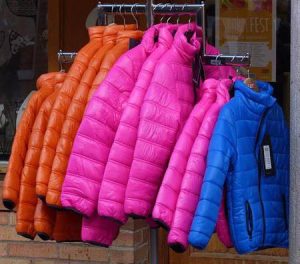
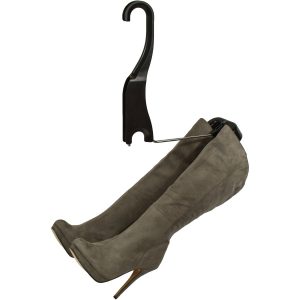
One says to pack these types of items into large containers, and the other — to leave them hanging. You’ll need to see which works better for your particular situation. If you have an extra, out-of-the-way closet, take whatever you won’t be using in the spring and summer and hang it there. You can hang items in a garment bag to keep out dust. We also recommend an extra Boot Butler for that extra closet so that your fall and winter boots stay crease-free until the next time you’re ready to wear them.
Follow the same rules we’ve outlined above for shoes and boots — especially the “get ’em fixed; get ’em clean” part. You do not want to be hunting for your boots on the first day of a major winter storm to find that there’s a broken lace or zipper.
Get That Closet Nice And Sparkling
A final step before you begins unpacking your spring and  summer goodies. And that’s a good deep clean of your closet. Dust every place you can think of, including baseboards, moldings, and shelves. If you have shoe shelves, take them outside and give them a good shake to get rid of any debris, then clean them thoroughly. Sweep and mop or vacuum. This is also a good time to assess your hanger situation. (Here’s our handy guide if you need a bit of help.) The right hangers will help your overall closet organization, and matching which ones fits best with particular items of clothing is a good thing for your clothes.
Ready!
And now you’re ready to unpack your spring and summer items. As you do so, go through the same process with which we began: Assess whether that item truly belongs in your closet. See if there’s anything that needs cleaning or mending.
And finally: Have fun organizing your spring and summer closet!


